Create a custom role
Pick exactly which permissions a role has, and whether it works in one store or all.
Go to Roles & permissions and select Create role.
Enter a Role name and a short description.
Choose where it Works in:
All stores: across every store in the business.
One store: pinned to one store, chosen when inviting.
Tick the permissions it needs. They’re grouped by area: Products, Inventory, POS, Orders and so on.
Save.
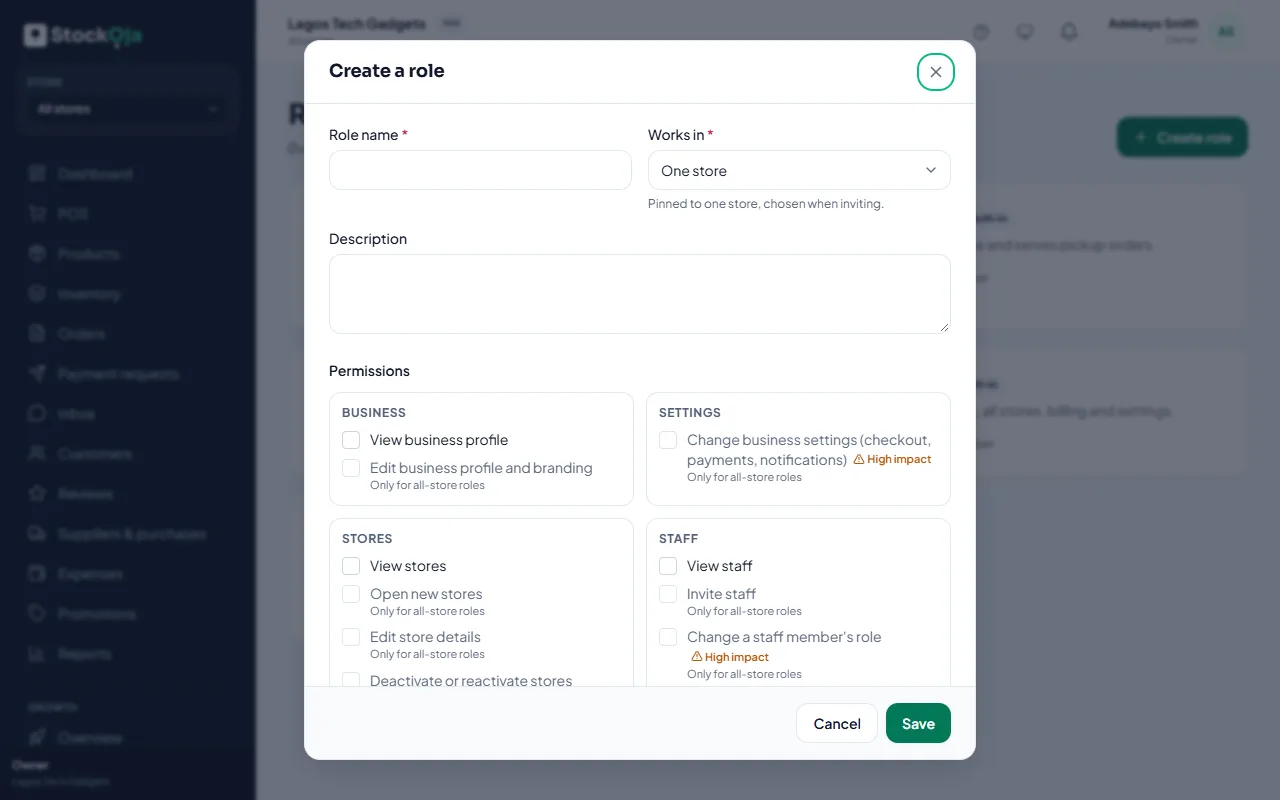
Permissions marked High impact affect money or security. Some are Only for all-store roles, such as changing business settings.
Edit or delete a role
Changes apply straight away to everyone with the role. You can only delete a role that nobody has, including deactivated staff. Built-in roles can’t be changed or deleted.
Related articles
- Permissions explained What each permission allows, grouped by area.
- Change a staff member’s role Give someone more or less access. It takes effect immediately.
- Invite staff Send an email invitation with a role, and a store for store staff.
- Deactivate or reactivate staff Remove someone’s access without losing their sales history.